<aside>
💡 Summary
Using HubSpot tasks for prospect emails involves a four-step process: creating an email template, setting up bulk tasks, selecting the tasks and starting the queue, and sending the email using the pre-made template. This method can be used for prospecting, following up with old prospects and existing customers, or customer support. Each step is crucial to achieving your desired outcome and can significantly streamline your process and enhance your productivity.
</aside>
<aside>
💡 Need help with HubSpot and its supported apps? Contact Crocodile Marketing today for a free chat.
</aside>
Introduction
In this guide, we will be exploring how to use HubSpot tasks for sending prospect emails. We will walk you through a comprehensive four-step process: creating an email template, setting up bulk tasks, selecting the tasks and starting the queue, and finally, sending the email using the pre-made template. Each step will be explained in detail to ensure you can smoothly implement this process in your own project management endeavours.
<aside>
👉 This method can be used for prospecting, following up with old prospects and existing customers, or customer support.
</aside>
Steps
1. Create Sales Email Template for Campaign
This section provides a step-by-step guide on creating an email template in HubSpot. It includes instructions on navigating the interface, entering necessary details, adding personification tokens and other elements, and saving the template. The guide also highlights important notes and best practices for successful template creation.
-
In your HubSpot account, navigate to Library > Templates.
-
Click New template, then select From scratch.
-
Enter a name and subject for your template.
-
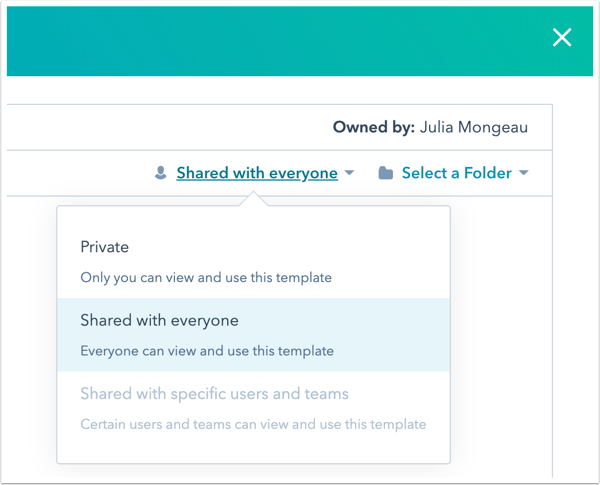
To make the template private so only you can view and use the template, click the Shared with everyone dropdown menu and select Private. You can also change who the template is shared with on the templates dashboard.
-
To add the template to a folder, click the Select a folder dropdown menu.
-
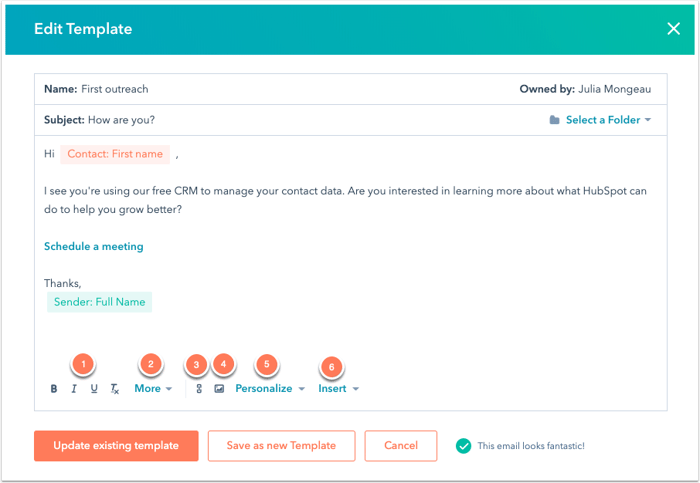
Enter the body of your email.
- Use the formatting options at the bottom of the editing window to modify the text.
- To edit the font style and size, or edit the text alignment, click the More dropdown menu.
- To add hyperlinked text, click the link icon link.
- To insert an image, click the image icon insert Image.
- To include personalisation tokens in your email template, click the Personalisation dropdown menu. Learn more about adding personalisation tokens to your sales email templates.
- To insert a snippets, sales document, scheduling link, or video, click the Insert dropdown menu.
Please note: templates must include text. Templates with images only will not attach successfully to your email in HubSpot or your email client. It is not recommended to copy and paste content from another text editor, as this can cause formatting issues in the HubSpot template editor. If you do need to paste content, make sure to paste only the text itself and not any previously applied styling.
- When you've finished creating your template, click Save template.
You can now send template emails from the CRM and your email inbox using the sales extension, or add template emails to your sequences.